Access control management
Access control are available for two type of entities:
- accounts, that should be seen as “customer account” that are billable entities to which are attached subscriptions and applications
- applications
There are two types of access rights: administrator or guest.
Otherwise, since Nudge 2.17, it is possible to manage user groups in order to simplify actions when there are many applications to manage.
Accounts and users groups
Account and user groups management (create/delete, add/delete members…) is accessible from User menu and then “Account” tab.
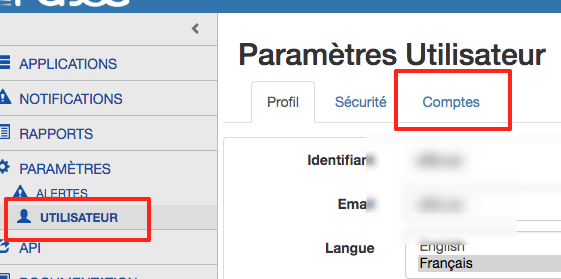
First, get sure you are on the account you aim to by selecting it in the account dropdown list.
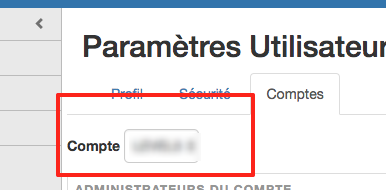
In the top of the screen you can manage account’s administrators.
Members of this list are the only ones that are able to view this screen.
The groups management form is in the bottom of the screen.
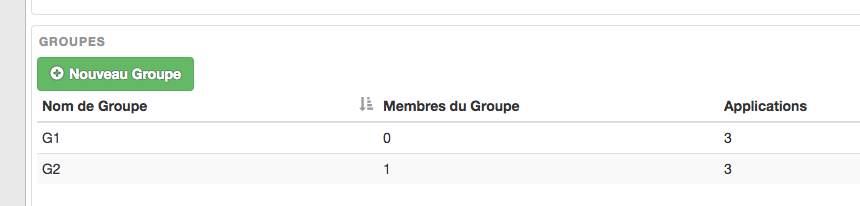
You can create new group with the “New Group” button. Give it a name, manage its members and its applications authorizations.
Add a member : just fill the email field, then click “Add member”. The user will be added to the list and you can repeate this for every users that should be member of this group.\
Then you can add authorizations for this group : choose an applciation in the dropdown list, choose the acces right level and finally click on “Add application”. Repeat this for every application this groups should be allowed to access.
Once the form filled, click on the “Create” button.
Then the group is added to the list of existing groups for this account. you can manage already existing groups juste by clicking on any row of this list.
Applications access controls
There are two levels of access rights for applications:
- Guest : allowed to view monotoring
- Administrator : allowed to manage the application
There are two ways to reach the administration screen of an application :
- from the global dashboard open the menu on the right of the applications’s row you want to manage, then clic on “Setting”.
- from an aplication’s monitoring, click on the gear near the applciations’s name on the top of the screen.
Click on the Authorizations tab.
There are two lists in this screen : on for the users direct authorizations the other from groups authorizations.
You can add or remove from those two lists.
Transactions
The performance information of your applications is associated with transactions.
A transaction represents a technical request about your application.
For example:
- An HTTP request if your application implements a web service (REST, SOAP or other)
- A call to a method of the application (at the application code level)
Nudge will attempt to automatically configure the transactions that match incoming calls to your application.
It also allows you to configure a transaction by entering a method or set of methods of your application’s code.
Filters
Filters are applied to transactions identified by the probes in the applications.
To see how to create and typically use a regex-based naming filter, click here
They allow to either exclude monitoring of certain transactions or to assign a name to each transaction in Nudge-APM.
In the absence of a filter, the transactions use the code captured by the probes for the name.
For example, the URL for a web transactions, the name of the Queue in a JMS server, the SQL code for a query in the database, etc.
By assigning descriptive names to transactions through the use of filters :
- to group transactions that would have been in principle distinct but correspond to a single business transaction
- or to the contrary, separate transactions that would have been grouped in principle even though they belong to quite distinct functions.
In cases where your applications contain many distinct transactions, we strongly recommend that you set up filters so that your dashboards are readable.
Filters are associated with an application.
They aggregate transactions according to criteria that define a scope (see below).
Naming filter
This filter allows you to group all transactions from a given scope into a single transaction.
The transaction can be renamed to anything you want. To create such a filter, you need:
- The name associated with the filter (that appears in the filter list)
- The scope of the filter (see below)
- The name of the associated transaction
If the transaction is a URL, then it is possible to define the name of the new transaction based on call data of that transaction.
Variables are used with braces in the name of the new transaction.
Here are the variables that can be used for the name of the renamed transaction:
{URL} : The relative path of the called URL
{IP} : The IP address of the client
{METHOD} : The HTTP method used
{USER_AGENT} : The string is defined by RFC7231 and sent by the client to define the system.
{REQ_HEADER:?} : The value of the HTTP HEADER of the request replaces the '?'
{RESP_HEADER:?} : The value of the HTTP HEADER of the response replaces the '?'
{REQ_PARAM:?} : The value of the request parameter replaces the '?'
Exclusion filter
This filter allows you to hide transactions.
Just the scope of the filter (see below) and its name are required to set it.
All transactions that meet the filter criteria will be omitted.
Configuring Filters
In order to configure the filters, you need administration rights on the application concerned.
A Filter tab from the application setup screen provides access to the dedicated management screen.
Here are some examples of configurations of filters for frequent cases of use:
| Use case | Type | Perimeter | Target name |
| Clean useless transactions (contained statics for example) | Exclusion | Code ending by *.css | ø |
| Group transactions job identical | Naming | Code corresponds to (regex) /any-request-with-id/* | /any-request-with-id/{id} |
| Distinguish transactions job different with url identical | Naming | Code egal to /app.do | app.do, action={REQ_PARAM:action} |
Clarifications
The creation, modification or deletion of a filter does not alter the history of the data already collected and analyzed by Nudge.
A transaction cannot see applying that a single filter. So if a transaction belongs to the perimeters of several filters, the only one of them will be applied, and it in a not determinable way explicitly. Thus it is necessary to avoid creating several filters the perimeters of which recover.
An SLA whose scope is defined by the code of the transactions will use the modified post filter codes.
| Use case | Type | Perimeter | Target name |
| Clean useless transactions(for exemple: static content) | Exclusion | Code finishes by *.css | ø |
| Aggregate business transactions identical | Naming | Code corresponds to (regex) /any-request-with-id/* | /any-request-with-id/{id} |
| Distinguish businness transactions different with the same url | Naming | Code equal at /app.do | app.do, action={REQ_PARAM:action} |
Rest API
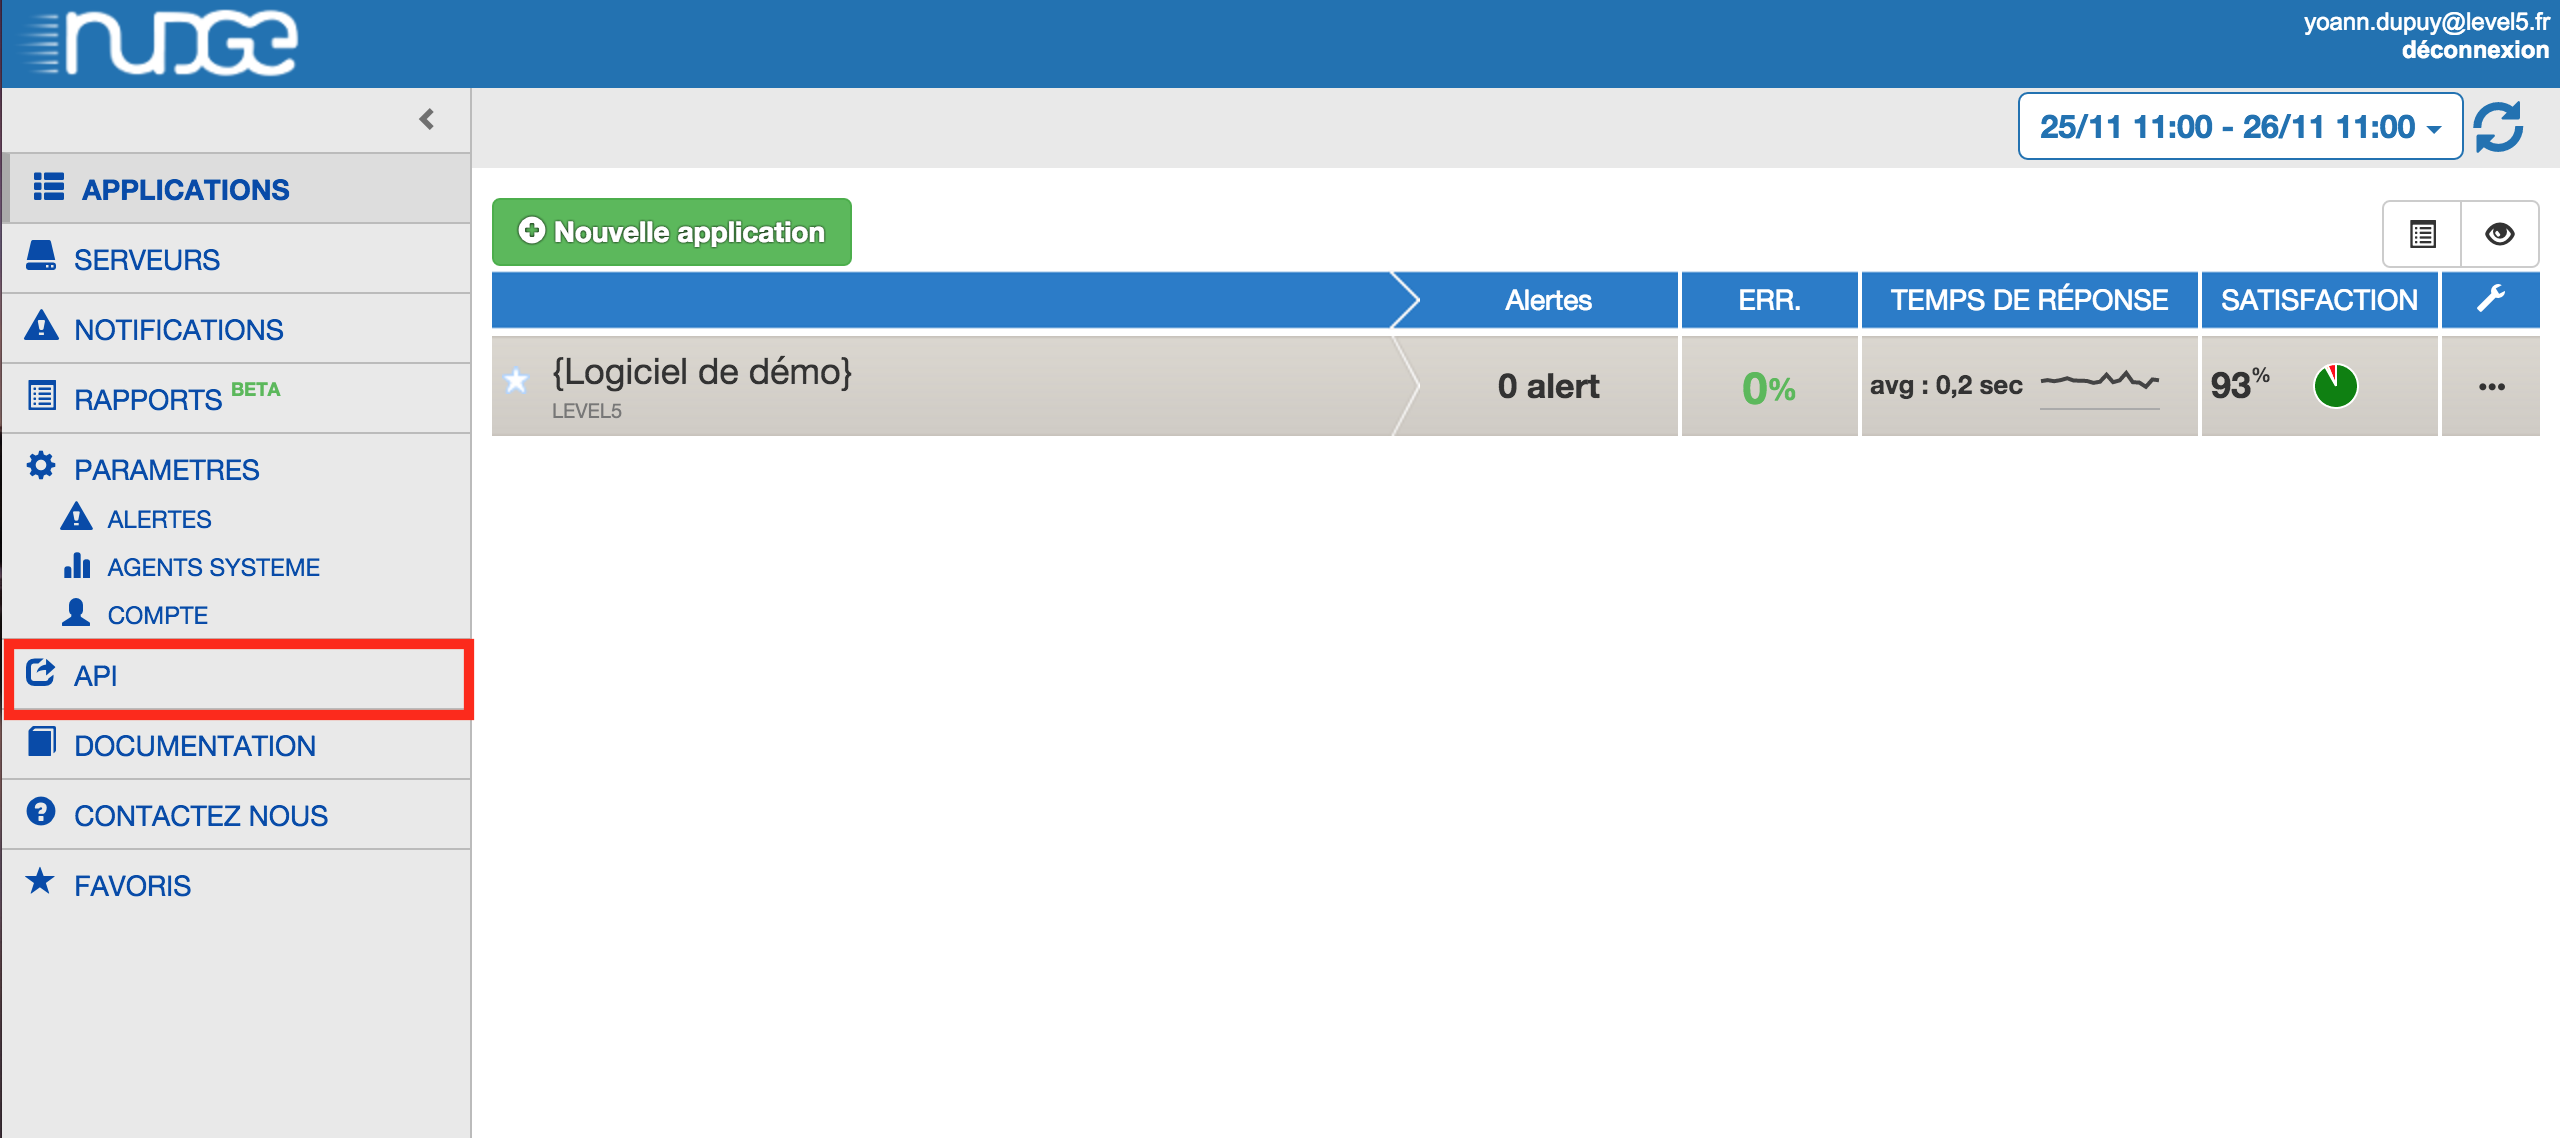
Once connected, just click on the API button in menu on the left handside.
Have fun using our REST API:
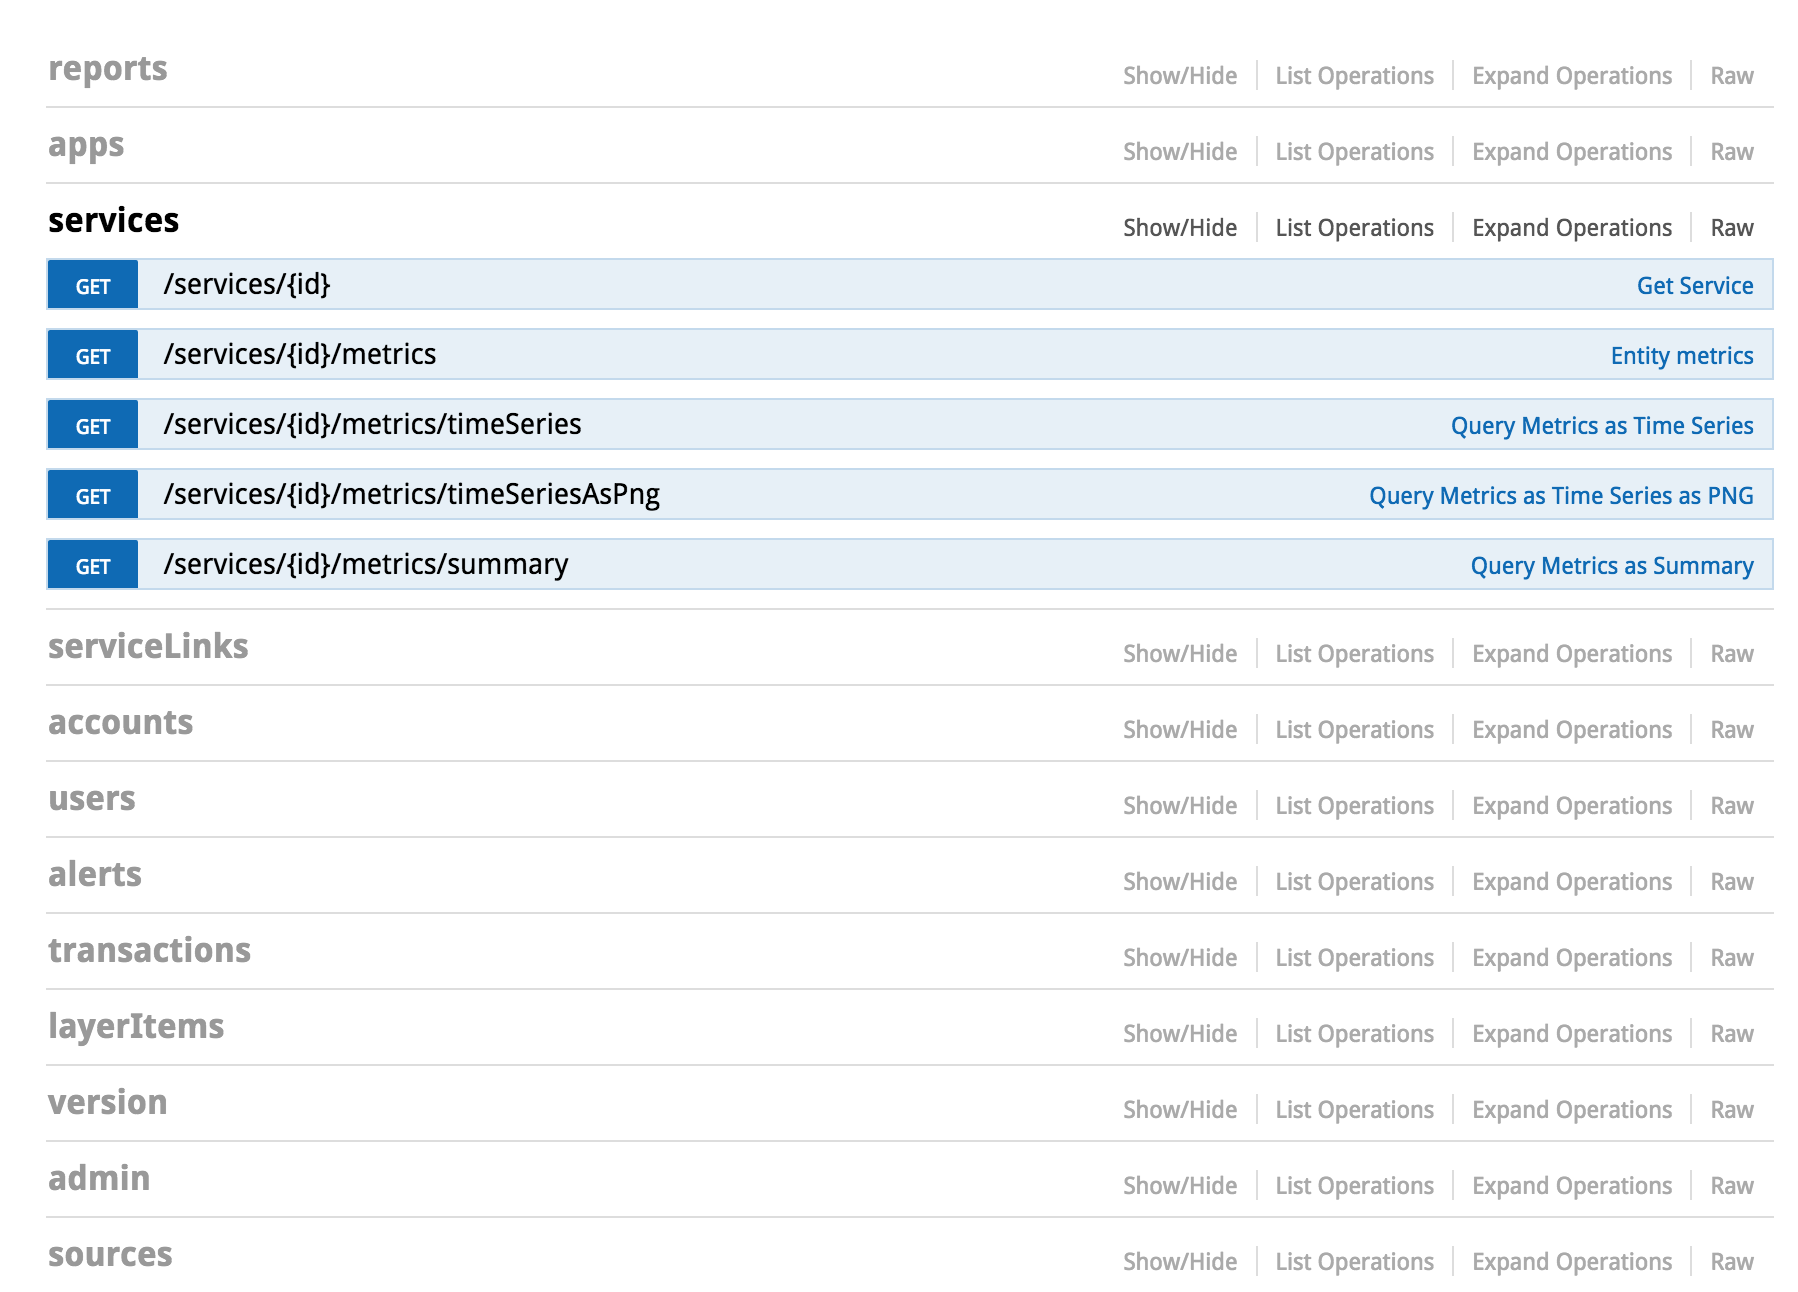
Get all data information in JSON format, and build your own dashboards or complete the existing ones with Nudge APM data.
Reports
How to build your reports.
Step 1: Create a report
Click on Reports tab on the left handside of the Nudge APM Plateforme
Click on new report

Click on new report
A pop-up appears in which you can add title and description to your report.
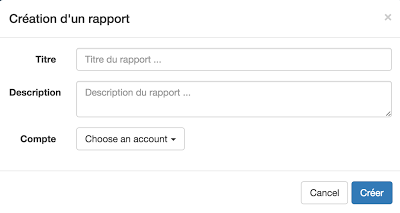
Click on create.
Step 2: Choose the content of your report
Your report is created.
You can now choose every data or chart you want to add.
Navigate through your applications and click on to add the corresponding widget in your report.
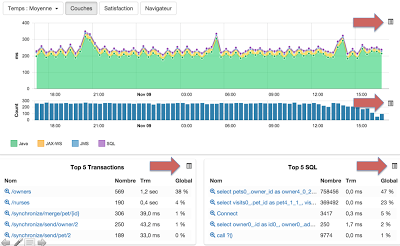
Note : by clicking on the button you can also create a new report.
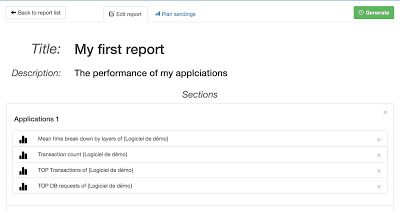
Step 3: Edit your report
Once every widgets are added to your report, you can now set it up.
Go into reports tab and click on the report you want to edit, and organize it by:
- changing the title
- adding sections
- moving elements in the right section (drag and drop)
Step 4 : Generate your report
Once your report is ready, click on generate
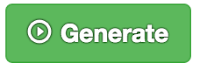
You can choose three different sending modes:
- direct download in .PDF
- send by email in .PDF
- send by email in HTML
Note : if you send it by email, you can choose the different recipients.
And you just have to choose the time period of the report.
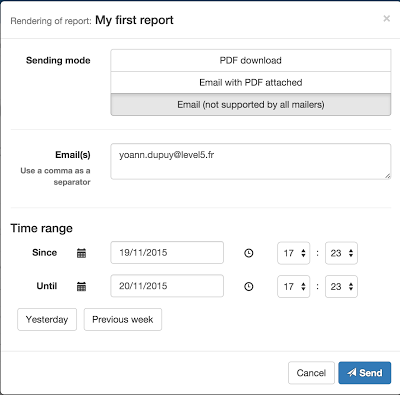
Step 5 : plan periodic report sendings
Reports can be sent automatically on a regular basis. With this feature, without any action, previously configured reports can be sent with updated data to recipients of your choosing.
You can add a sending plan of update one of them:
- from the report list by using the dropdown menu at the right of the corresponding report, and after a click on the link with the label Plan sendings
- from the report edition screen, after a click on the tab named Plan sendings
Many sending plannings can exist for a single report.
A sending planning is bound with:
- a periodicity (daily/weekly/monthly)
- email addresses of recipients
- an output format (PDF or HTML)
Configuration
Liste non exhaustive des paramètres qu’on peut configurer lors du démarrage de l’application.
Grafana
These settings are used to manage the integration and display of Grafana dashboards.
grafana.regex
Default value : ^.*atakama-technologies.com.*
Corresponds to the regular expression that Grafana dashboard urls must respect when they are entered in the integration form.
Several regular expressions can be entered, separated by a semicolon.
Example : ^.*atakama-technologies.com.\*;^Http://ph-viewer.[a-zA-Z]\..atakama-technologies.com*
grafana.domain.patterns
Default value : atakama-technologies.com*
Allows time slots to be synchronised between the Nudge application and integrated grafana dashborads.
This parameter must correspond to a character string contained in the domain name of the Grafana dashboard url.
Warning: This is not a regex but a character string.
Several character strings can be entered, separated by a semicolon.
Example : atakama-technologies.com;Https://ph-viewer
Automatic data suppression
Our cassandra database allows you to set up automatic data deletion by updating the following parameters.
table.time_to_live
Default value : 7884000
The value, in seconds, of this parameter is used to configure the lifetime of the data stored in the relevant tables in the database.
If this is not already the case, we advise you to set the gc_grace_seconds parameter to 0 in all the database tables.
To do this, use the following command: ALTER TABLE table_name WITH gc_grace_seconds = 0;